Panoramica del driver audio virtuale BlackHole

Recording internal audio on macOS has long been a frustrating experience for many users, especially with the operating system’s limitations on routing sound between applications. Enter Buco nero , a free and open-source virtual audio driver for macOS that lets users record internal audio with low latency and high reliability. In this article, we’ll explore full details about the process on how to use BlackHole to record Mac internal audio.
1. What Is BlackHole Virtual Audio Driver?
Buco nero is a macOS kernel extension developed by Existential Audio. It acts as a virtual audio device, enabling audio to be passed between applications without the need for external hardware. In other words, it allows you to record or route internal system audio with apps like QuickTime Player, OBS, Audacity, GarageBand, and more.
BlackHole is widely used by musicians, podcasters, streamers, and educators who need to capture or process internal audio for recording, broadcasting, or routing to other applications.
2. BlackHole 2ch vs. 16ch
BlackHole comes in two versions: 2-channel (2ch) E 16-channel (16ch) . Here’s a comparison to help you choose:
| Caratteristica | BlackHole 2ch | BlackHole 16ch |
|---|---|---|
| Canali | 2 (Stereo) | 16 |
| Setup Complexity | Simple | Avanzato |
| Use Case | Basic stereo recording | Multi-track routing (e.g. live streaming, DAWs) |
| Suitable For | Beginners, everyday users | Professionals, musicians, producers |
| System Load | Low | Medium to High |
BlackHole 2ch
is ideal for most users who want to record YouTube audio, in-game sound, Zoom calls, or system alerts.
BlackHole 16ch
, on the other hand, is perfect for musicians or streamers needing complex routing to multiple apps or devices simultaneously.
3. The Step-by-Step Guide to Recording Mac Audio with BlackHole
Here’s how to record internal audio on Mac with BlackHole (such as BlackHole 2ch), step by step:
Step 1: Download the BlackHole 2ch installer from the official aite, open it and follow the setup instructions (Restart your Mac if prompted).
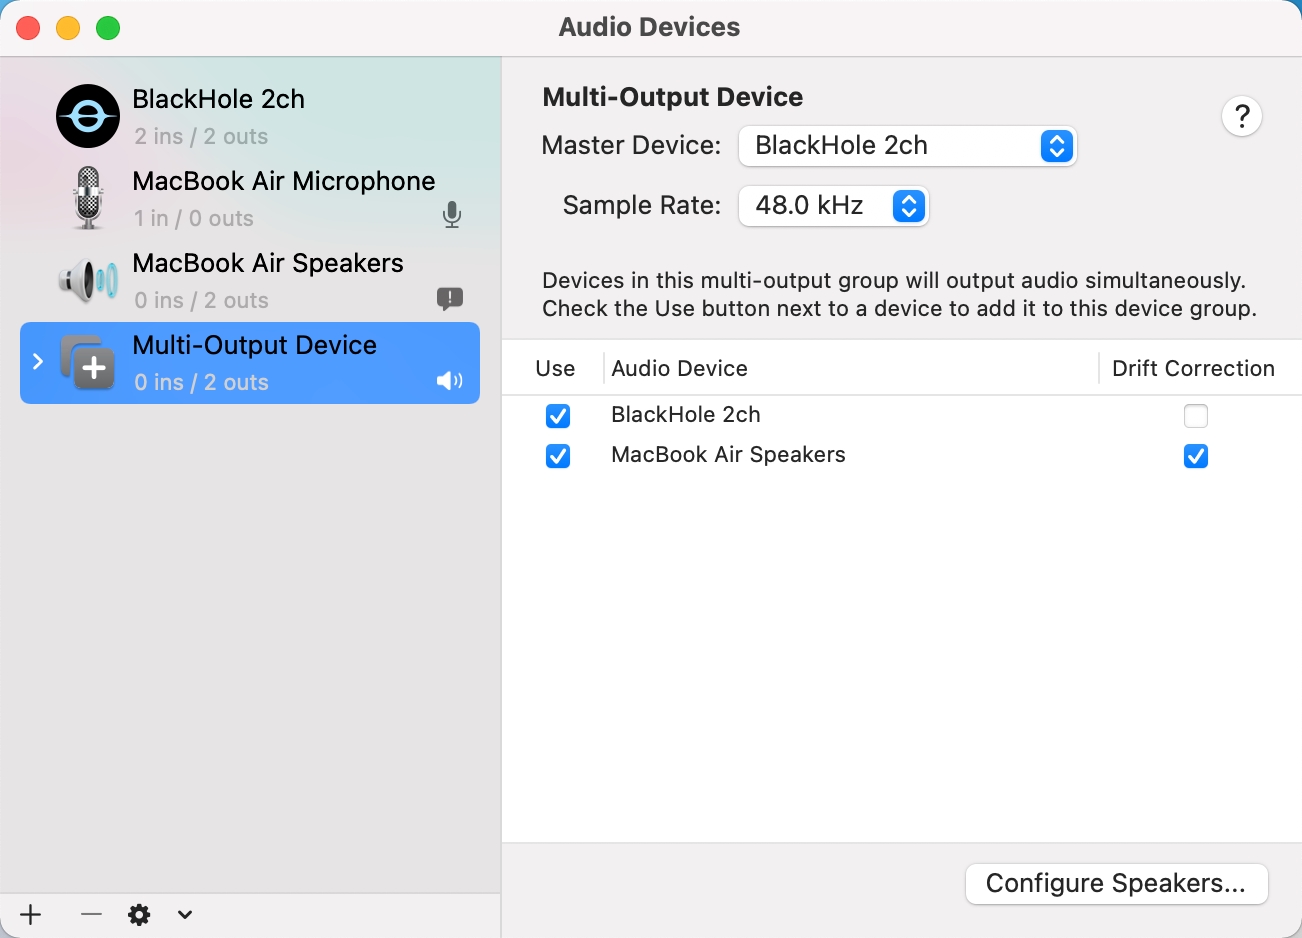
Step 2: Create a Multi-Output Device
- Aprire Configurazione MIDI audio (Applications > Utilities).
- Hit the “ + ” sign in the bottom-left corner and choose “ Crea dispositivo multi-output ”.
- Check both Uscita integrata E BlackHole 2ch .
- Make Uscita integrata the master device.
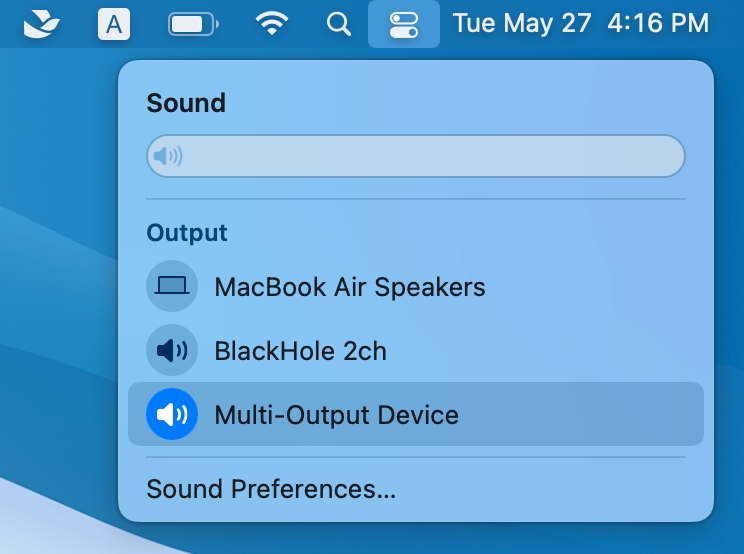
Step 3: Change Mac Output to Multi-Output Device
- Navigate to System Settings, then click Sound > Output.
- Choose your new Multi-Output Device so the Mac sends sound to both speakers and BlackHole.
Step 4: Set input source in Your Recorder
- Run a recording program such as QuickTime Player, Audacity, or OBS Studio.
- Set the input device to BlackHole 2ch .
- Start playing the internal sound and hit record.

4. How to Uninstall BlackHole on Mac?
If you no longer need BlackHole, here’s how to safely remove remove blackhole 2ch or 16ch from mac:
Aprire Terminal to enter the command:
sudo rm -rf /Library/Audio/Plug-Ins/HAL/BlackHole.driver
Provide your admin password to authorize, and reboot your Mac.
Another option is to uninstall BlackHole by downloading and executing the automated uninstaller: Download Uninstaller .
5. Pros and Cons of BlackHole
✔️ Pros:
- Gratuito e open source
- Zero-latency audio routing
- Works well with macOS Ventura and later
- Trusted by professionals and developers
❌ Contro:
- No user interface
- Setup requires manual configuration
- May confuse beginners
- Cannot directly monitor audio via speakers without Multi-Output setup
While BlackHole is powerful, it’s not the most user-friendly option for casual users or those seeking simplicity.
6. Try the Simple but Powerful Alternative – Recordit
If you’re looking for an easier way to record internal audio on Mac without setting up virtual devices, Recordit is a modern, user-friendly alternative.
Caratteristiche principali di Recordit :
- Record internal audio, mic, or both
- Record also screen and webcam
- High-quality video/audio output
- Convert and export to popular formats
- Simple, modern interface
How to Capture Internal Audio on Mac Using Recordit :
- Install the most recent Recordit version for Mac on your device by downloading it.
- Lancio Recordit and give it access to your Mac sound and camera.
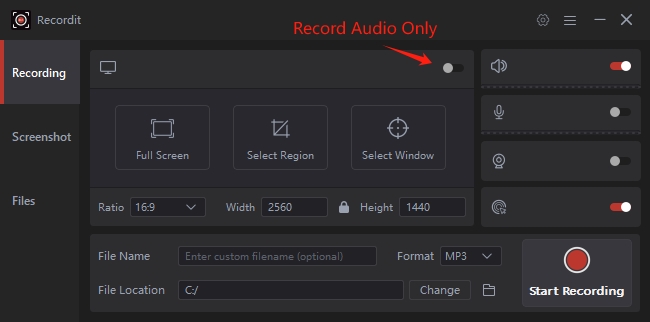
- Enable Record Only Audio mode, activate system audio, then choose the output quality and format.
- Click Start Recording and begin playback of the internal audio (music, video, app sounds, etc.).
- Stop Recording and Recordit will auto save and show the recording within the software “Files” tab.
Con Recordit , you can launch the app, select your input/output preferences, and start recording within seconds – no multi-output, no terminal, no third-party plugins.
7. BlackHole vs. Recordit
| Caratteristica | Buco nero | Recordit |
|---|---|---|
| Audio Type | Internal only | Internal, mic, or both |
| UI | None (terminal + MIDI setup) | Intuitive graphical interface |
| Setup | Manual and technical | One-click start |
| Curva di apprendimento | Steep for beginners | Beginner-friendly |
| Price | Gratuito | Free trial |
| Ideale per | Developers, musicians | General users, content creators, educators |
8. Conclusion
BlackHole offers a strong virtual audio driver solution, designed for users needing to route internal audio between different applications. It’s open-source, customizable, and widely trusted by audio professionals. But it’s not for everyone — setup is manual, and usage can be confusing for beginners.
That’s where Recordit shines. It simplifies the entire recording experience by allowing users to capture internal and external audio with no configuration hassles. If you’re tired of managing virtual devices and just want to start recording, Recordit is the go-to solution.