Get Started with Picman
Welcome to the guide for Picman! Picman keeps the photos in your own folders in order: it groups them by the day they were taken, finds duplicates and look-alikes, renames them in batches, and imports photos from your iPhone. There is no library to import and nothing to sync. This guide walks you through installing Picman, the everyday tasks, and registering your license.
1. Download and Install Picman
1.1 Download Picman
Picman runs on Windows 10 and Windows 11. Click the Download gratuito button below and wait for the Picman installer to be saved on your PC.
1.2 Install Picman
- Apri il tuo Download folder and double-click picman.exe .
- Follow the installer. It takes less than a minute and adds Picman to the Start menu.
- Open Picman from the Start menu or the desktop shortcut.
The first 30 days are free, with every feature. See Register Picman for what happens after that.
2. Browse Your Photos
Picman opens your Pictures folder. Every folder on your PC is in the sidebar on the left: Pinned holds Pictures and Desktop, and Questo PC lists your drives and their folders. Click any folder to see its photos, grouped by the day they were taken.
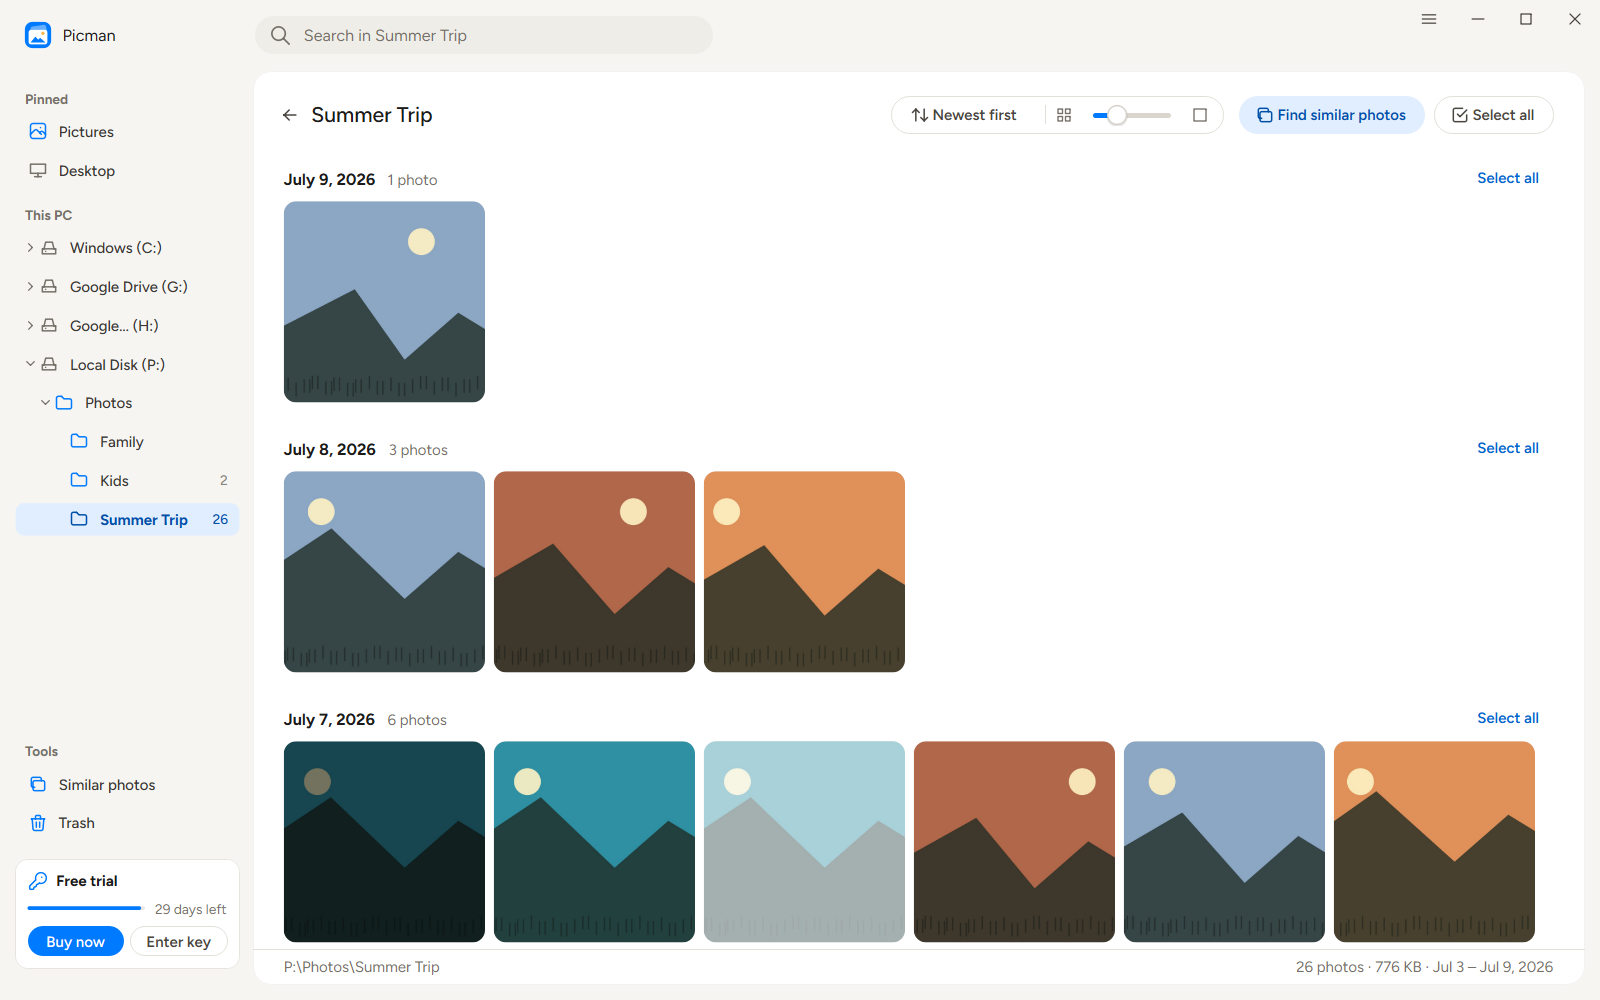
- Sort : click Newest first to sort by oldest first, name or size instead. Names sort the way you read them, so IMG_2 comes before IMG_10.
- Photo size : drag the slider next to it, or press Ctrl + = E Ctrl + − .
- Search : type in the search box at the top to find photos in the folder by name.
- Selezionare : click the round check on a photo, Ctrl-click or Shift-click to add more, or click Select all for a whole day. Ctrl + A selects everything in the folder.
The date comes from the photo itself (the date the camera or phone recorded), including HEIC photos from an iPhone and RAW photos. Photos without one use the file’s date.
3. View Photos and Their Details
Double-click a photo, or select it and press accedere , to open it in the viewer. Click Details (or press I ) to see when it was taken, its size in pixels and megapixels, the camera and lens, the aperture, shutter speed, ISO and focal length, and where it was taken, with a link to see the place on a map.
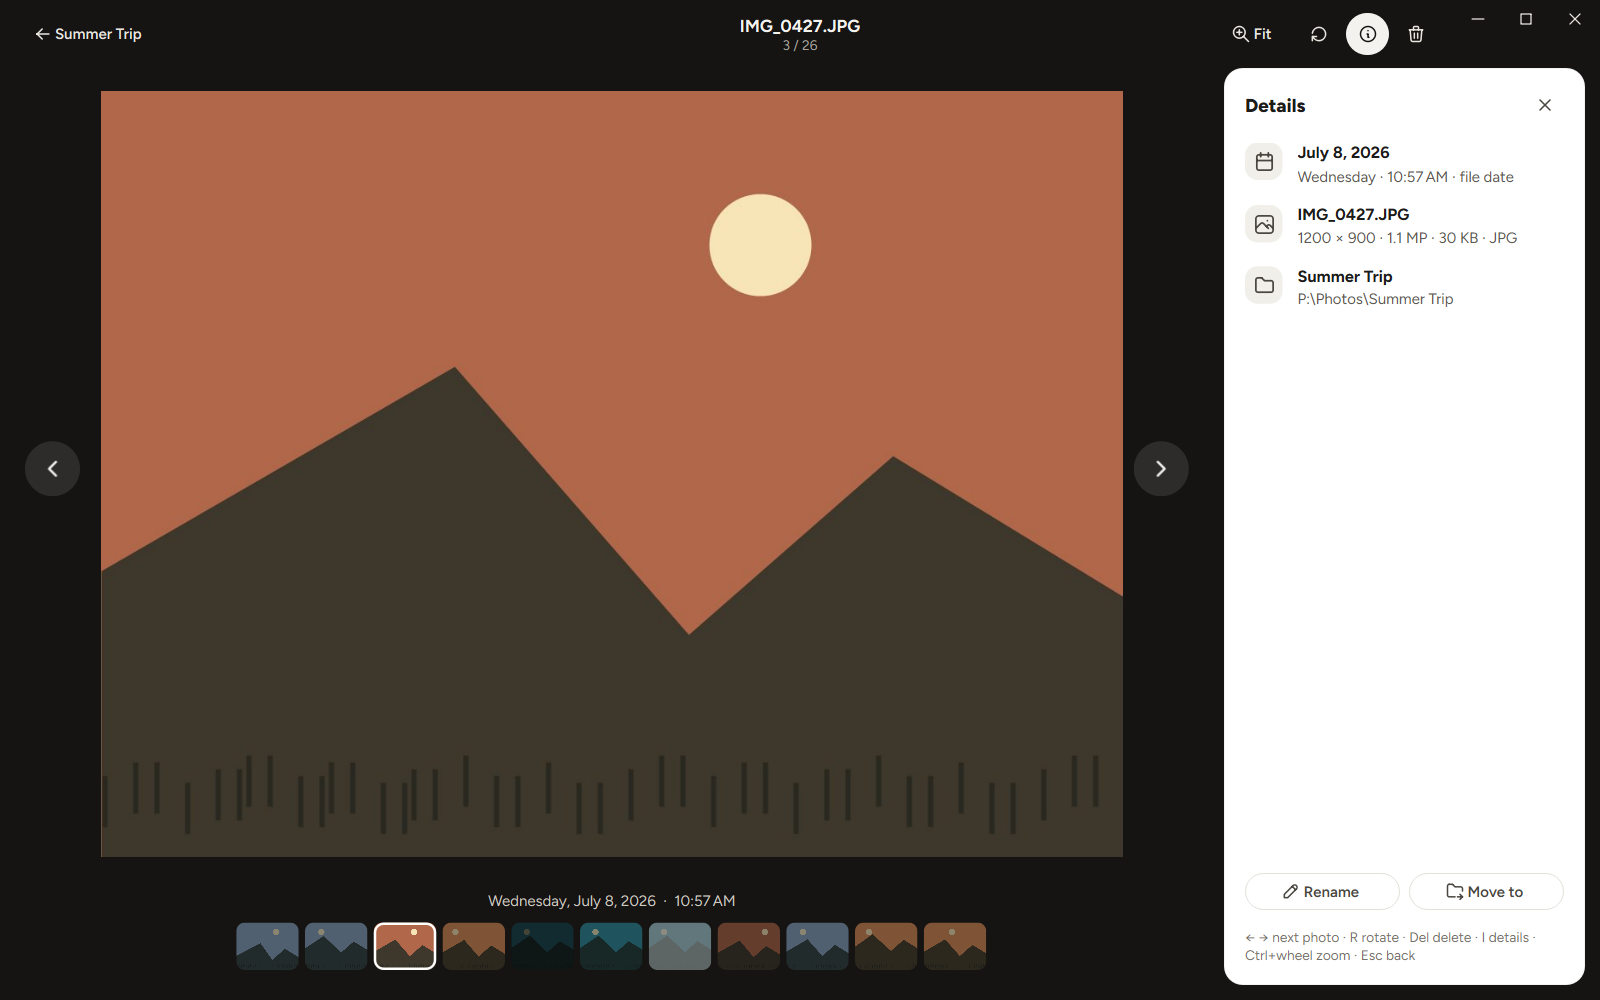
- ← / → : the previous or next photo.
- Ctrl + mouse wheel : zoom in and out. Z switches between fit and 100%, and a zoomed photo can be dragged around.
- R rotates, Del deletes, and Esc goes back to the folder.
4. Rename, Move, Rotate and Delete
Select one or more photos and use the bar that appears at the bottom, or right-click them. Everything can be undone with Ctrl + Z O Undo in the message that appears.
4.1 Batch Rename
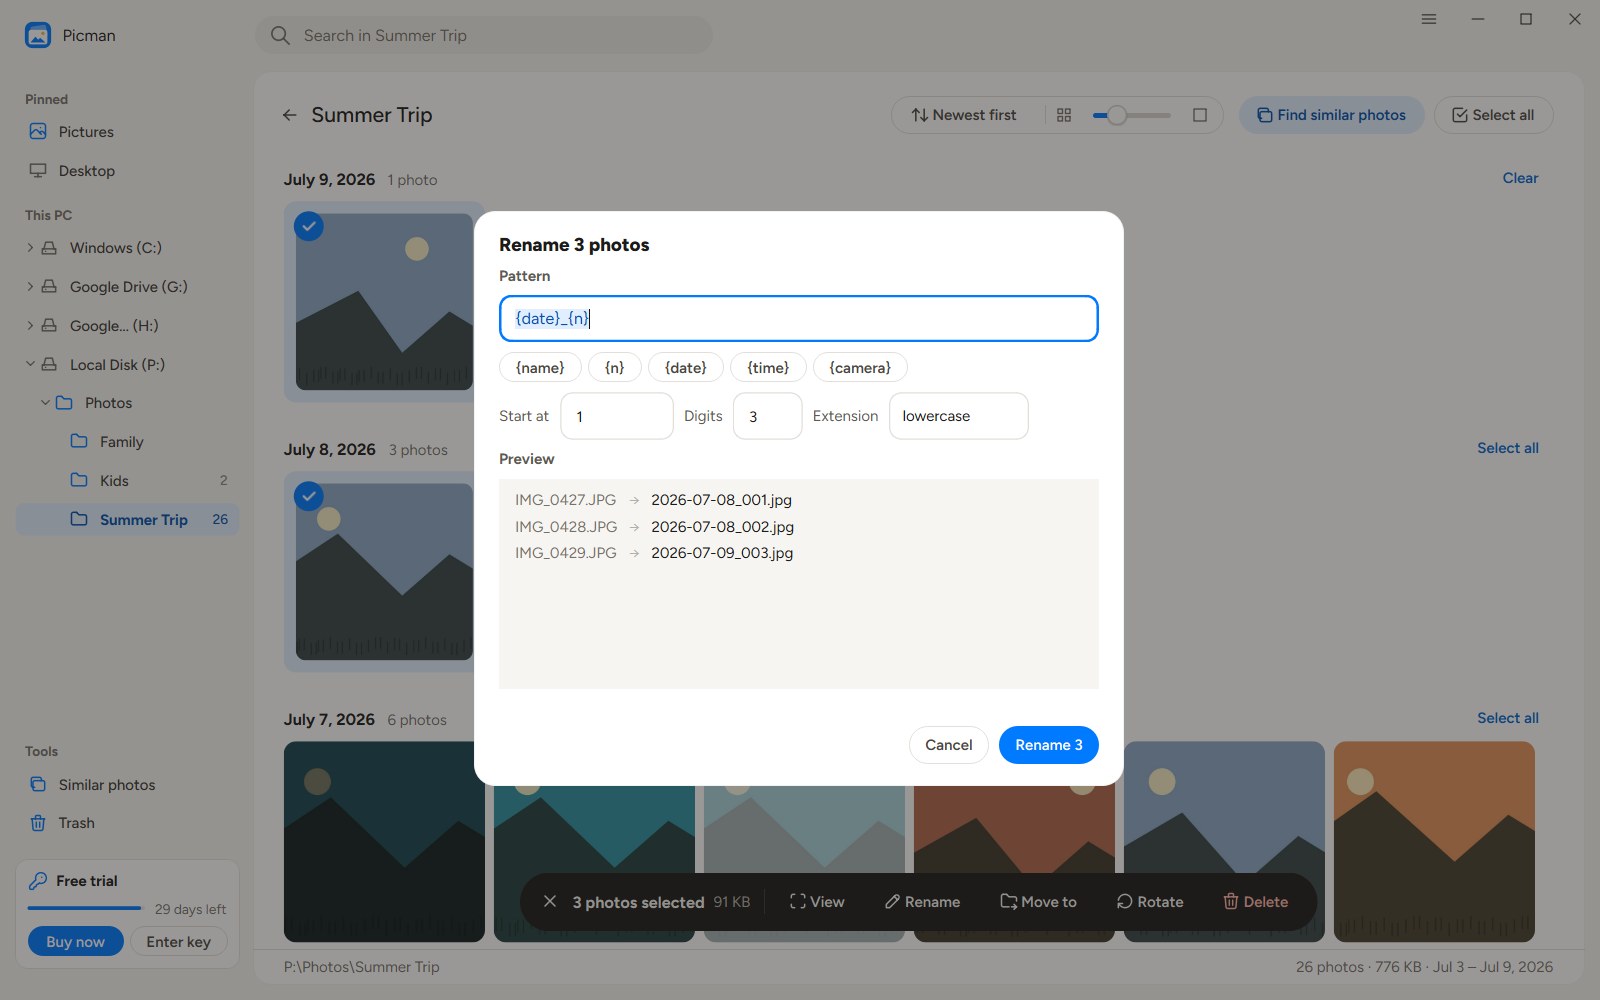
Premere F2 to rename one photo. With several selected, Rinominare builds the new names from a pattern, and shows every new name before anything changes. You can use:
- {name} : the photo’s current name
- {n} : a number counting up, 1, 2, 3…
- {date} E {time} : when the photo was taken
- {camera} : the camera or phone that took it
For example, Summer Trip {date} {n} . If two photos would end up with the same name, Picman tells you before renaming, so no photo is ever overwritten.
4.2 Move and Copy
Drag the selected photos onto a folder in the sidebar to move them there. Hold Ctrl while dragging to copy them instead. You can also press M (or click Spostati in ) and pick a folder you used recently. If a photo with the same name is already there, both are kept, and the new one is named “name (2)”.
4.3 Rotate
Clic Rotate oppure premere R . JPEG photos are turned without losing any quality.
4.4 Delete
Clic Eliminare oppure premere Del . The photos go to Picman’s Trash, where you can get them back. See Trash and Undo .
5. Find Similar and Duplicate Photos
Clic Find similar photos at the top of a folder, or Similar photos in the sidebar. Picman finds exact copies and photos that look alike, such as a burst of shots of the same moment. In each group it keeps the best one (the original, or the sharpest that is well exposed) and marks the rest Rimuovere .
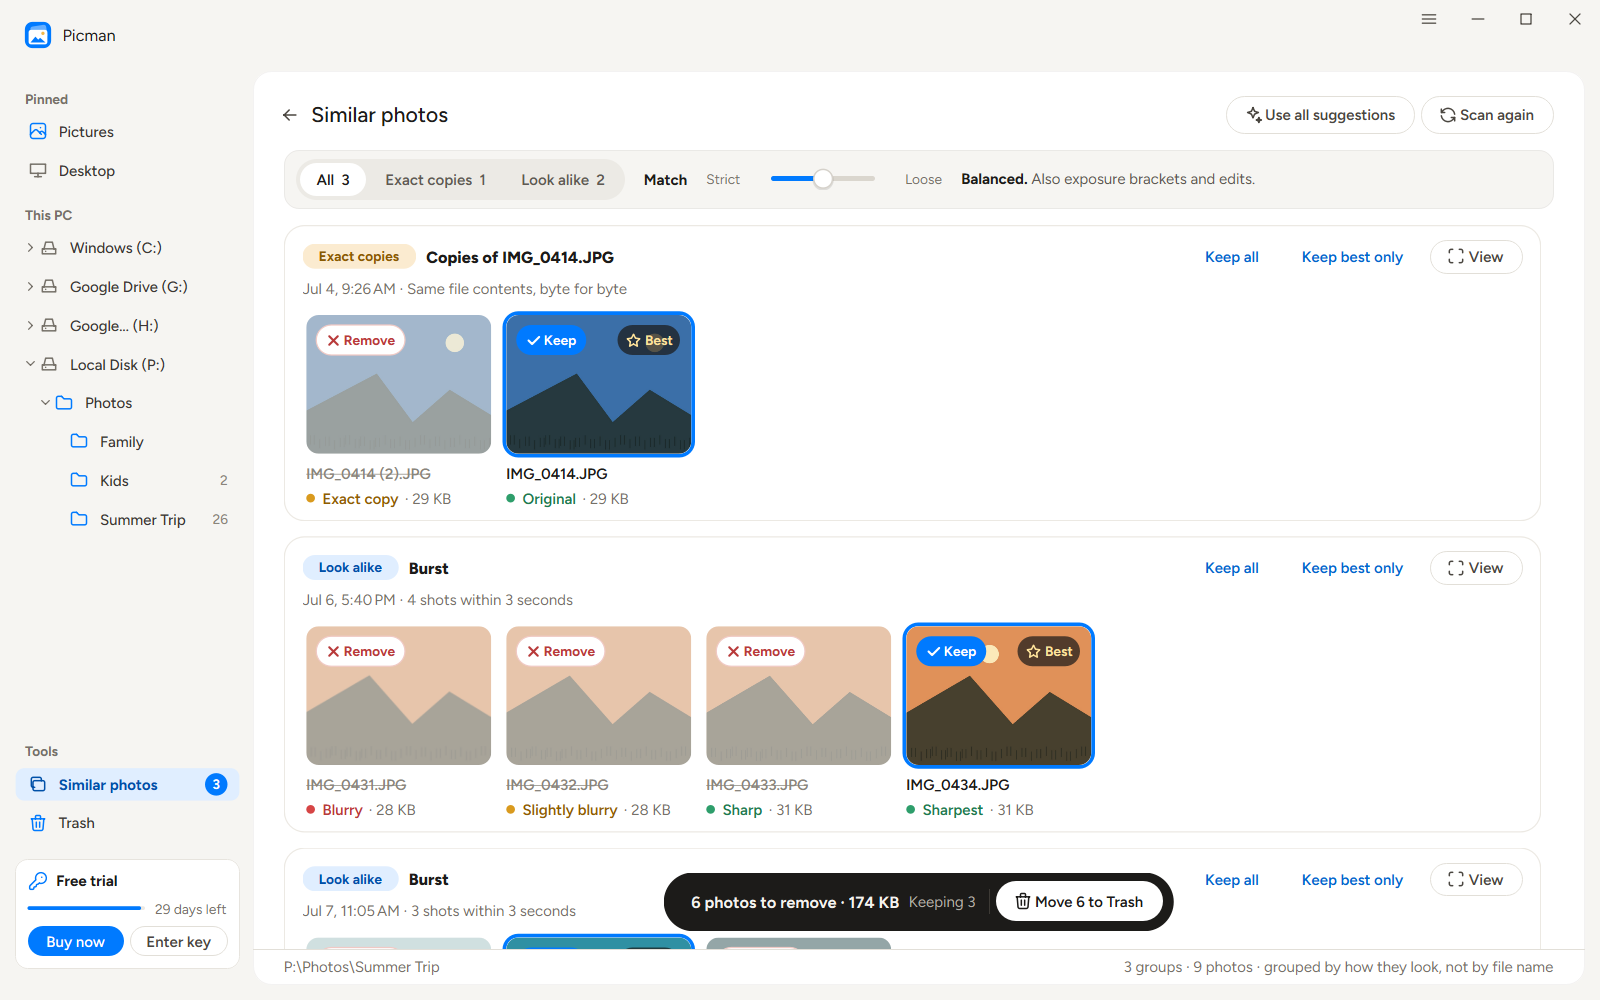
- Check the groups. Click a photo to change whether it is kept or removed.
- Trascina il Match slider toward Strict for only near-identical photos, or toward Loose to find more look-alikes.
- Clic Move N to Trash . Nothing is deleted before you do.
6. Import Photos from Your iPhone
- Connect your iPhone to the PC with a cable and unlock it. If the iPhone asks whether to trust this computer, tap Trust .
- Click the iPhone under Questo PC in the sidebar. Its photos appear grouped by day, and the ones you have already imported are marked On PC .
- Select the photos you want, or select all, and click Importare .
- Choose how to arrange them in the Pictures\iPhone folder (a folder per month, per day, or all in one folder) and whether to delete them from the iPhone afterwards.
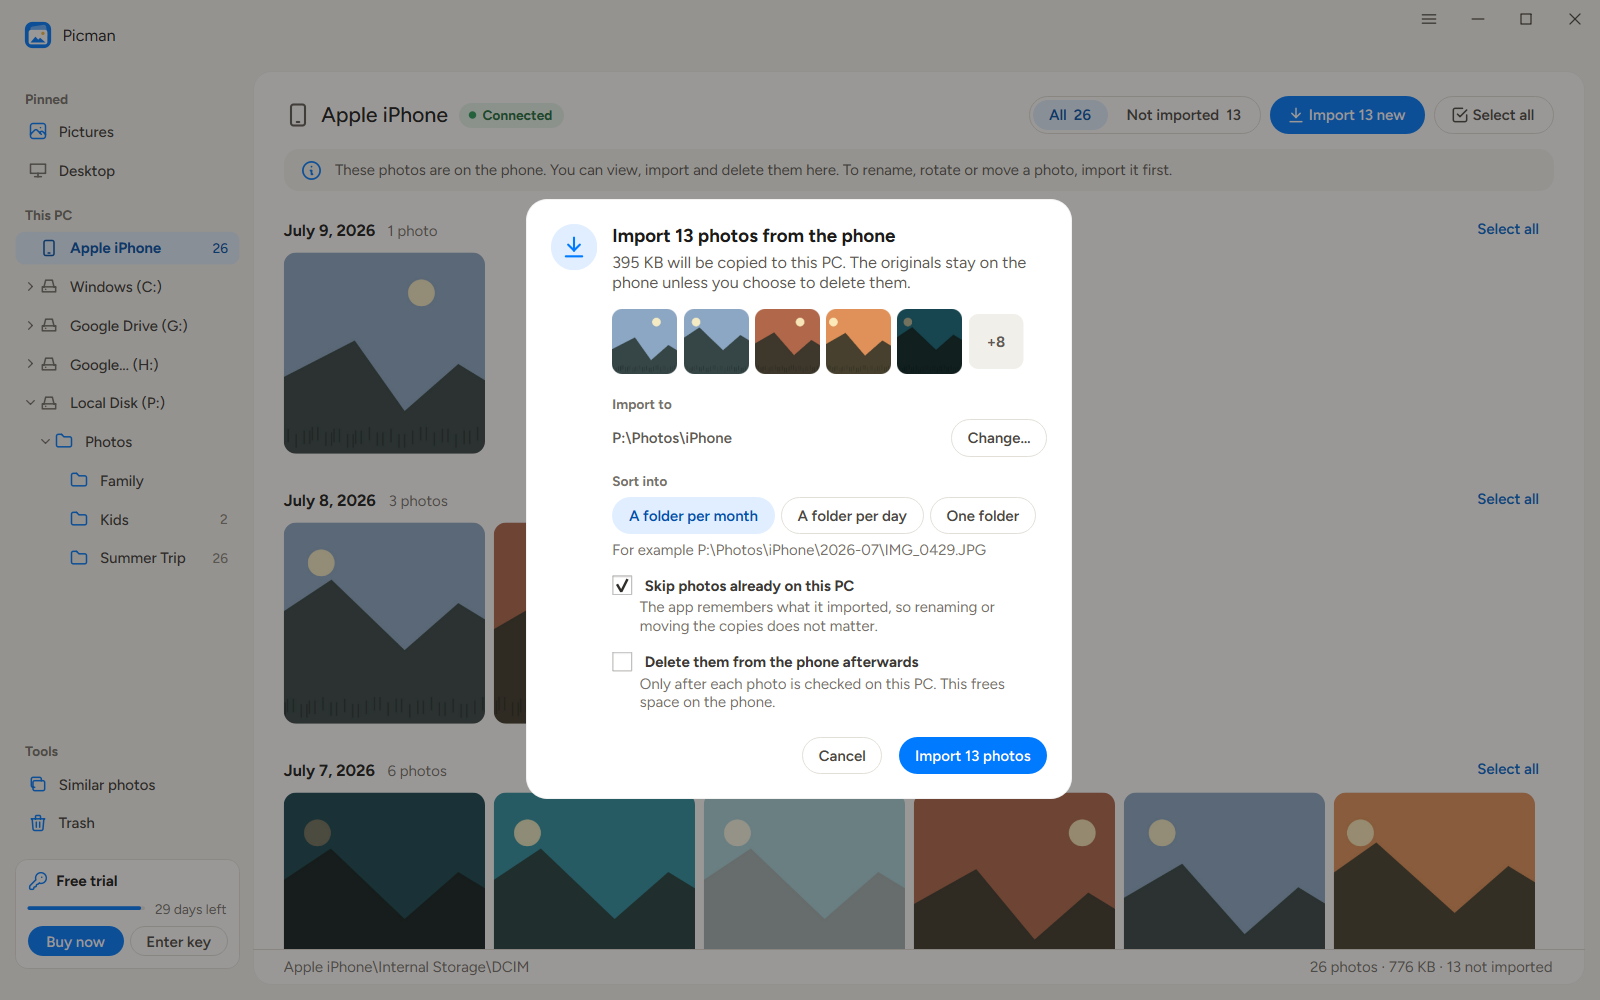
Photos already on the PC are skipped, so you can import again at any time and only get the new ones. If you chose to delete them from the iPhone, each photo is removed only after its copy on the PC has been checked.
7. Delete Photos from Your iPhone
Free up space on your iPhone from your PC: select the photos on the iPhone and click Eliminare . Picman first copies each photo into its Trash on the PC, then removes it from the iPhone, so a photo deleted by mistake can still be restored.
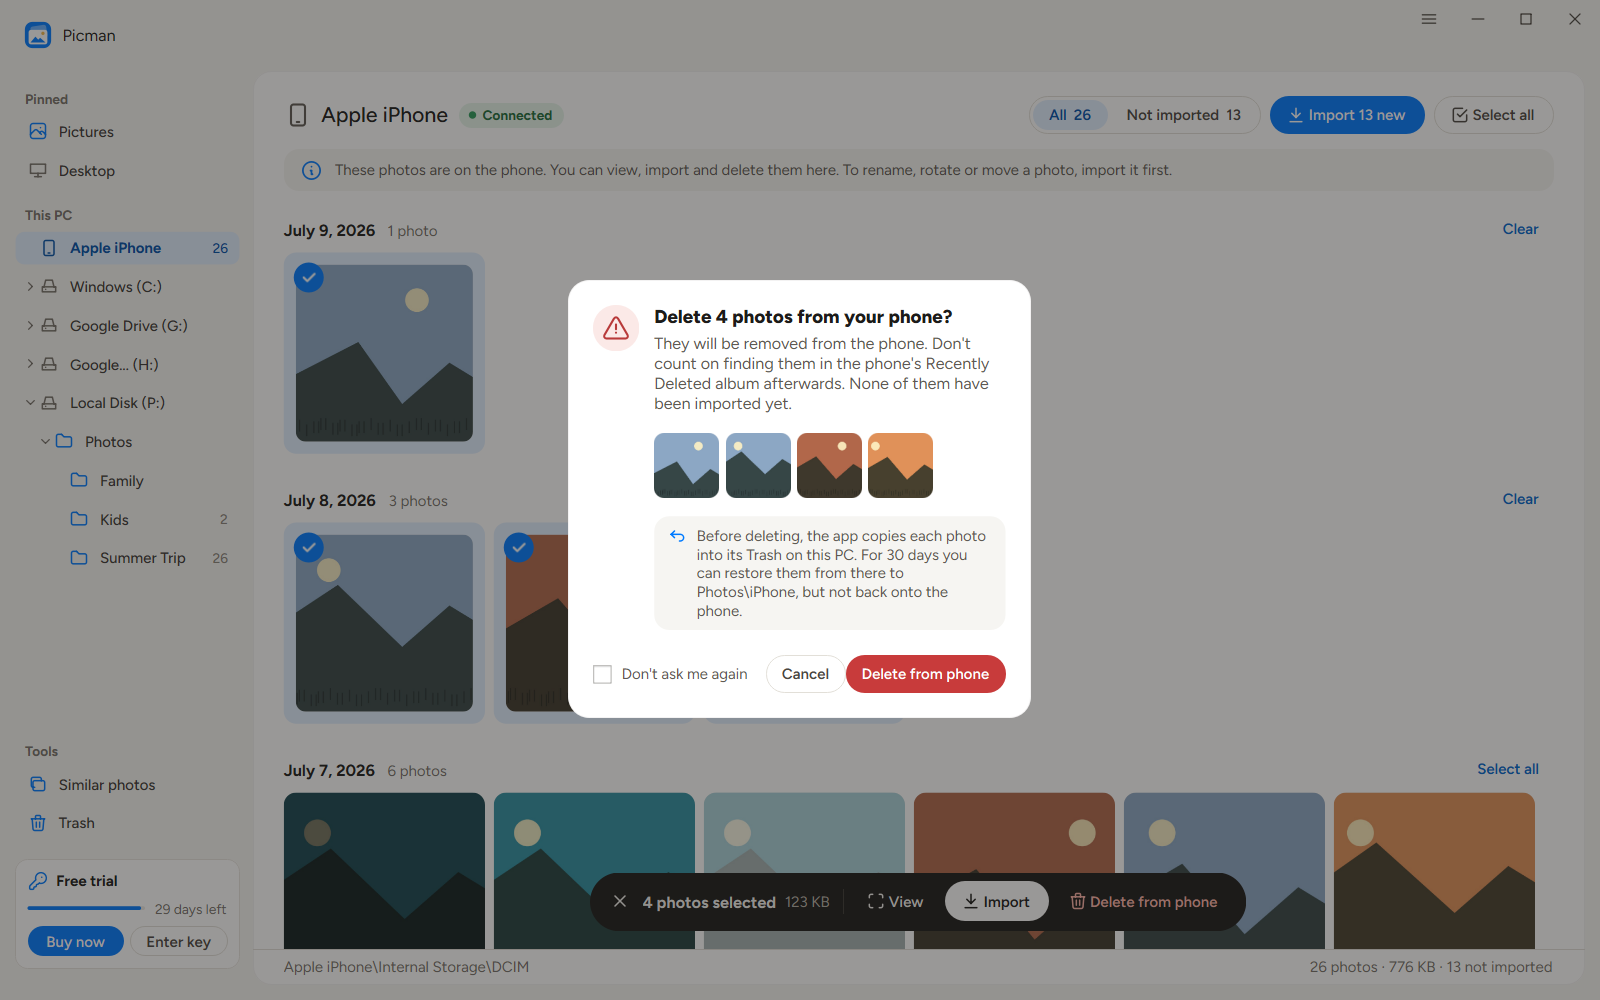
You can also open photos on the iPhone to view them. To rename, rotate or move them, import them first: an iPhone doesn’t allow those changes.
8. Trash and Undo
Deleted photos go to Picman’s own Trash in the sidebar, not to the Recycle Bin. Select photos there and click Restore to put them back in their folders. If the folder is gone, Picman creates it again.
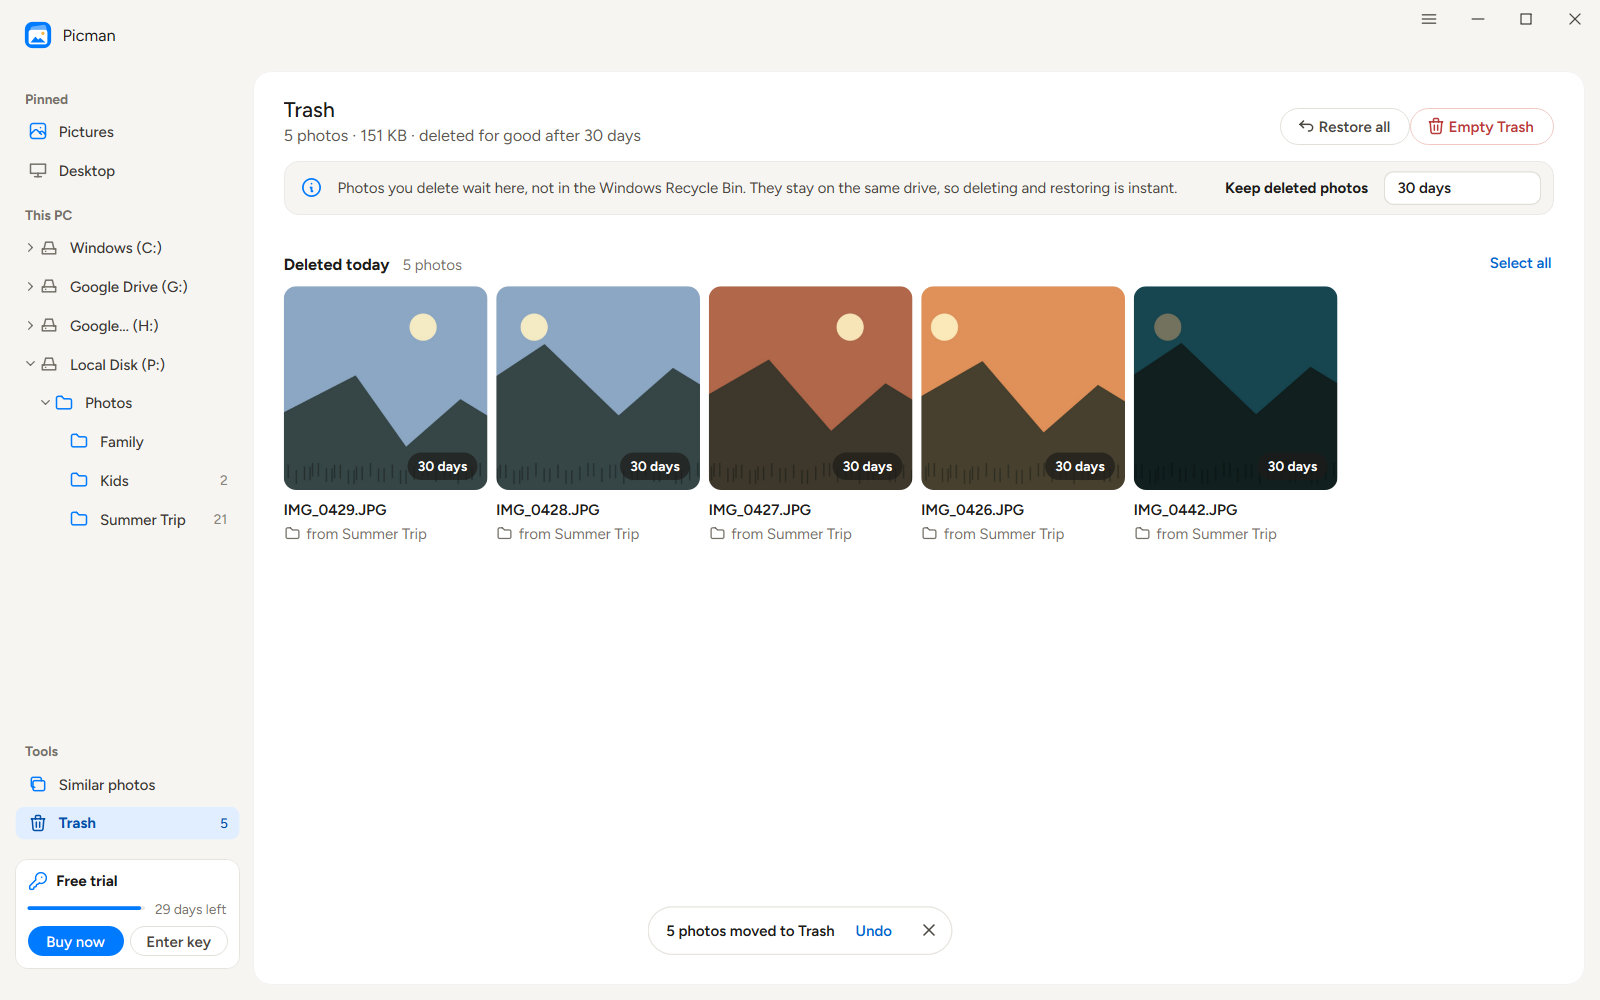
Photos stay in the Trash for 7, 30 or 60 days, or until you empty it. Delete forever E Empty Trash always ask first. Press Ctrl + Z to undo the last delete, restore, move, copy, rename or rotate, and Ctrl + Y to redo it.
9. Language, Updates and About
Click the menu button (☰) next to the minimize button at the top right:
- Language : Picman speaks English, 简体中文, 繁體中文, 日本語, 한국어, Español, Français, Deutsch, Português (Brasil) and Русский. It switches straight away, without restarting.
- Check for updates… : see whether there is a newer version. Picman also checks by itself when it starts, and only tells you when there is one.
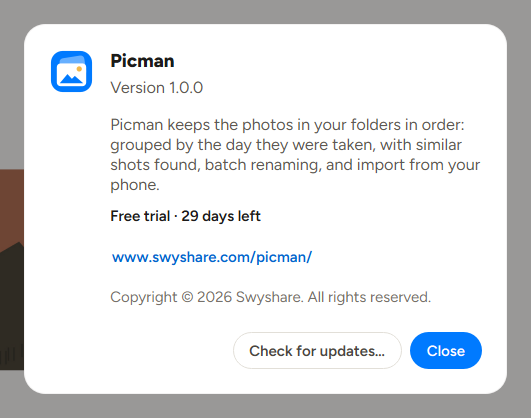
- About Picman : the version you have and your license.
10. Register Picman
Picman is free for 30 days, with every feature. The card at the bottom of the sidebar shows how many days are left.
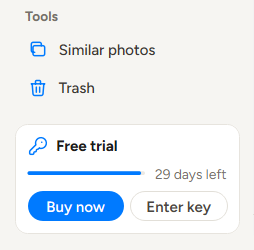
After the trial you can still browse your folders, view your photos and their details, and restore photos from the Trash. To rename, move, rotate or delete photos, find similar photos, or import from your iPhone again, you need a license.

10.1 Buy a License
Clic Buy now in Picman, or go to the Picman pricing page . The Lifetime plan is for 1 PC and the Family plan for up to 5 PCs, with free updates. After you pay, you receive an email with your order details and your license key.
10.2 Enter Your License Key
- Copy the license key from the order email.
- In Picman, click Enter key on the card at the bottom of the sidebar, or Register… in the menu (☰).
- Paste the key and click Registrati . After a few seconds, Picman is registered and the trial card disappears.
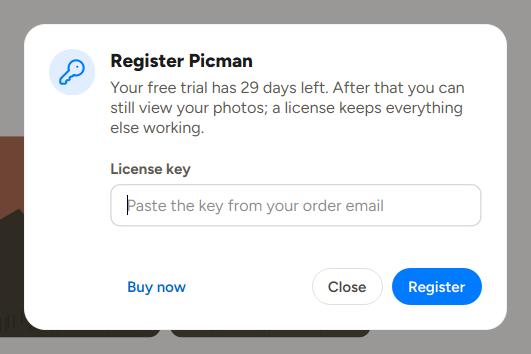
Your PC must be connected to the internet to register. If the key isn’t accepted, Picman tells you why: for example, that it isn’t a Picman key, or that it is already used on as many PCs as the plan allows. To see your license later, open License… in the menu.
11. Get Help
If you have a question, or something doesn’t work as you expect, contact us at [e-mail protetta] . Please tell us your Picman version (from About Picman ) and, for a license question, your order number.